Welcome to Walk Through Tip, your definitive resource for navigating the most challenging escape room puzzles. In this post, we offer an in-depth guide for Rooms & Exits Bookstore Chapter 1 Level 24 Walkthrough. Our detailed Rooms & Exits walkthrough you through every step of this intriguing level that combines cognitive challenges, item-based puzzles, and secret codes. Our guide not only provides clear, step-by-step instructions but also dives into the deeper logic behind each puzzle, enabling you to fully understand and enjoy every twist in Rooms & Exits. Whether you are a newcomer looking for an easy entry point or a seasoned player seeking advanced tips, this walkthrough is designed to deliver comprehensive insights while reinforcing top ranking keywords like Rooms & Exits Bookstore Chapter 1 Level 24 Walkthrough, Rooms and Exits complete level guide, and escape walkthrough Rooms & Exits.
Chapter Overview: Setting the Scene for Chapter 1
In Chapter 1 of Rooms & Exits, the game opens with several everyday environments that quickly reveal layers of puzzles and hidden secrets. Each level in this chapter is designed to engage you with familiar settings that mask extraordinary mysteries. In this chapter, every room is crafted to challenge your memory, logic, and observation skills. The particular level we examine here – Level 24: The Bookstore – is set in a charming, atmospheric bookstore that on the surface appears simple but soon exposes a labyrinth of puzzles, clues, and code-cracking challenges.
The unique aspect of this level lies in its ability to weave everyday objects into integral parts of the puzzles. Items such as books, posters, and even a curtain rope play significant roles in unmasking hidden compartments or revealing key equations. The design brilliantly hints at how common objects in our surroundings can be repurposed in unexpected ways. As you work through this walkthrough, keep in mind the strategic placement of each clue. For instance, the mini-game of matching books not only sets up the initial clue but also serves as a stepping stone toward a greater challenge involving secret doors and hidden rooms.
For many players, the allure of the Rooms & Exits Bookstore Chapter 1 Level 24 Walkthrough lies in its seamless blend of narrative and puzzle. It’s this combination that makes the escape room both engrossing and intellectually stimulating. This holistic approach compels you to think logically while maintaining a sense of adventure that every escape room enthusiast craves.
Walkthrough Preparation: Essential Tips Before You Begin
Before diving directly into solving puzzles, it’s vital to prepare adequately for the challenges ahead. The strategies that you’ll need in Rooms & Exits Bookstore Chapter 1 Level 24 Walkthrough involve more than just finding items they require careful observation, logical analysis, and sometimes even creative thinking. Here are some essential tips to help you get started:
- Examine Everything Closely: Every item within the room, be it a seemingly insignificant poster or a random sign, may hold a clue that can help you progress. Don’t rush through this stage; instead, take your time to inspect each object with care.
- Take Detailed Notes: Many of the puzzles revolve around numbers and colors (for example, flag counts and equations). Write these down as you encounter them because they often combine to form the final code.
- Inventory Management: Items you collect, like the green book or the half key, might not seem useful at first glance, but later can be combined with other objects to reveal hidden clues.
- Stay Organized: If you encounter multiple puzzles simultaneously, organize them in a mental or written checklist to keep track of your progress. This method ensures you won’t overlook an essential step.
With these preparatory tips in mind, you are now ready to dive deeper into the specific steps of this walkthrough.
Detailed Walkthrough: Step-by-Step Guide for Level 24
The walkthrough for Rooms & Exits Bookstore Chapter 1 Level 24 is divided into several key steps. Each step is broken down into actionable tasks, with detailed explanations for every action you need to complete in order to progress.
Step 1: Matching the Books on the Left Shelf
Your journey begins at the left side of the bookstore, where the room’s first interactive puzzle is located. In this area, you encounter a mini-game that requires you to match pairs of books. The puzzle design here is straightforward but demands a keen eye for detail:
- Match the Books:
You will see several books lined up on a shelf. Study each book’s cover carefully there are visual clues, such as color schemes, symbols, or even parts of a title that hint at which books belong together.
- Tip: Look for subtle patterns in the titles or graphic motifs on the spines.
- Tip: Look for subtle patterns in the titles or graphic motifs on the spines.
- The Reward – A Vital Note:
When you complete the matching challenge successfully, you will receive a note. This note is not just a piece of narrative fluff but contains an equation:
E = 5
This equation is essential for solving later puzzles in the level, so be sure to remember it or note it down. In many escape room games, these types of puzzles are foundational, serving as your first building block for the end-game code. - Understanding the Mini-Game:
This puzzle’s significance lies in its multifaceted role it sets you on a path for deeper investigation while also teaching you the importance of attention to detail. The designers of Rooms & Exits cleverly integrate fundamental gameplay mechanics through puzzles like these.
Step 2: Uncovering the Hidden Door – Removing the “Closed” Sign
Once the initial puzzle is solved, the next challenge involves discovering a hidden door. This step requires both observation and a bit of dexterity:
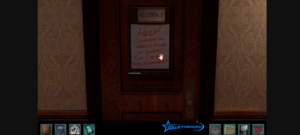
- Locate the “Sorry We’re Closed” Sign:
Hover over the top of the bookshelves to locate the sign. Although it appears as a mere decorative element, it holds the secret to a concealed section within the bookstore. - Action – Removing the Sign:
Tap the sign to remove it from its normal position. This action will reveal a previously concealed object a green book with a key icon. Such design elements are a common trick in puzzle games: what looks like an obstacle turns out to be the key to progress. - Placing the Green Book:
Return your focus to the left bookshelf. Notice that the shelf already contains several green books. The objective here is to place the newly retrieved green book in the correct spot amongst the others.
- Why This Works: The action of aligning identical items leads to the secret door mechanism being triggered. It speaks to the game’s underlying logic of matching and classification.
- Why This Works: The action of aligning identical items leads to the secret door mechanism being triggered. It speaks to the game’s underlying logic of matching and classification.
- Result – The Secret Passage Unveiled:
Once the book is properly placed, the entire bookshelf slowly slides aside, revealing a hidden passage that takes you into a secret room behind the main area. This kind of secret-door revelation is common in hidden object games and escape rooms; it rewards players for both careful attention and logical deduction.
Step 3: Exploring the Hidden Room – Collecting Critical Items
Upon entering the hidden room, your next objective is to explore and gather several essential items that will enable you to tackle more complex puzzles:
The Items You Need to Collect
| Item | Location | Purpose |
| Curtain Rope | Inside the box at the door | Ties up the curtain to reveal additional clues |
| Teddy Bear | On or near the window | Contains a hidden compartment when examined correctly |
| Knife | Under the couch cushion | Used to open or manipulate certain objects |
| Knob | Inside the glass cabinet | Unlocks a secret drawer with another clue note |
| Water Bottle | Near a small box on the floor | Crucial for completing the vase and cork puzzle |
| Symbol | Behind a picture above the couch | When combined with the half key, creates a full key |
In-Depth Analysis of the Item Collection
When you enter the hidden room, take your time to meticulously inspect every visible object. This step emphasizes the importance of thorough exploration. The curtain rope, for instance, might initially appear insignificant but plays a fundamental role in later sections of the walkthrough. The teddy bear is another object designed to catch players off guard; while its cute appearance might lead you to overlook it, a sharp eye reveals a small hidden compartment that holds half of a key. This clever design reinforces a major theme in Rooms & Exits don’t judge objects by their outward appearances.
Moreover, locating the knife is critical. It doesn’t just serve as a puzzle item; it is essential for certain interactions, such as opening compartments or even “cutting open” other objects to retrieve hidden clues. By combining such items intelligently, players are guided to a solution where logic meets creativity.
Step 4: The Colored Flags Puzzle – A Test of Memory and Observation
Another core challenge in the Bookstore level is the colored flags puzzle. This puzzle is presented through a poster that features an arrangement of colored flags. Here’s how you solve it:
- Observing the Poster:
Examine the poster hanging above the desk carefully. It displays several flags of varying colors and numbers. The puzzle requires you to count and record the number of flags for each color. - Counting the Flags:
Your counts should be as follows:
- Pink: 1 flag
- Yellow: 3 flags
- Red: 6 flags
- Purple: 4 flags
- Pink: 1 flag
- Using the Numbers:
Once you have these numbers, they must be applied to a separate panel of colored lights. Each number corresponds to the intensity or sequence in which the colors should be activated. This step is crucial for accessing another hidden compartment or progressing the narrative. - Why This Puzzle Works:
The colored flags puzzle is not simply about counting; it tests your ability to correlate visual data with a sequential input. Such puzzles enhance cognitive skills and are reflective of real-world problem solving. They require you not only to observe but to translate that observation into actionable data.
Step 5: The Vase and Cork Conundrum – An Interactive Challenge
As you progress further, you encounter what might seem like an everyday household puzzle the vase and cork challenge. However, this puzzle is more than just a straightforward task. It requires you to interact with multiple items to reveal another critical equation.
- Gathering the Water Bottle:
First, locate the water bottle that has been placed on the floor near a small box. This bottle is your key to the next stage of the puzzle. - Filling the Vase:
Once you have the water bottle, head to the coffee table where a vase is prominently displayed. Pour the water into the vase. This action causes a cork to rise to the surface a subtle yet ingenious hint by the game developers. - Retrieving the Cork and Using It:
After the cork rises, promptly pick it up. With the cork in your possession, you now have the chance to use it on another object: the wine bottle placed on a nearby chair. - The Hidden Equation Emerges:
When the cork is applied correctly on the wine bottle, a new note materializes:
I = X – E
This note is a critical piece of information that interlinks with previous equations. It introduces the variable I, which must be calculated using the known values. Such puzzles combine physical interaction with mental arithmetic and have become a recurring theme in Rooms & Exits. - The Lesson in Puzzle Design:
This particular puzzle shows that nothing in the game is random. Each item is deliberately placed with its own role, forcing you to think about how everyday objects can serve dual purposes in solving puzzles. It also emphasizes sequential logic where one action naturally leads to another.
Step 6: Decoding the Teddy Bear and the Half Key Puzzle
After you deal with the vase and cork, one of the more surprising elements of this level comes into play the transformation of a seemingly innocent teddy bear into a tool for unlocking further secrets.
- Using the Knife on the Teddy Bear:
Return to the hidden room and locate the teddy bear. Use the knife, which you previously found under the couch cushion, on the teddy bear. This interaction is critical because it reveals that the bear harbors a hidden compartment. - What You Find – Half of a Key:
Inside the teddy bear, you discover half of a key. On its own, it doesn’t open any lock, but it is the first part of a much larger puzzle. - Locating the Symbol for Combination:
In addition to the half key, there is another element nearby a symbol hidden behind a picture hanging above the couch. This symbol is designed to be combined with the half key. - Combining the Elements:
When you carefully compare the half key and the symbol, you will realize that they form a complete key. This new, complete key is your ticket to opening another locked item in the room. - The Role of the Complete Key:
Use the complete key on the chest located under the coffee table. Inside the chest, you will find another critical note that contains the equation:
T = I / I - The Puzzle’s Deeper Meaning:
This step is a reminder that all elements in the game are interconnected. The teddy bear, often seen as a mere decorative item, proves to be a significant puzzle element. The process of combining disparate objects into a functional whole symbolizes one of the key aspects of Rooms & Exits the importance of integration in problem solving.
Step 7: Unlocking the Desk Drawer – Revealing the Final Equation
At this juncture, you have collected several equations and clues. The next step takes you back to the main area of the bookstore to unlock one final piece of the puzzle.
- Interacting with the Desk Drawer:
Approach the desk present in the main section of the bookstore. A knob on one of the desk drawers is your next point of interaction. - Using the Knob:
Use the knob, which you discovered earlier in the hidden room, to open the drawer. This mechanism is designed not to reward you with an item but with another vital piece of information. - The Revelation – The Final Equation:
Inside the drawer, you will find the note stating:
X = 8
This value is the missing link in solving the complete final code. Each equation you have uncovered so far is part of the overall formula that will guide you to the exit. - Connecting the Equations:
You now have three critical equations:
- E = 5 (from the book matching mini-game)
- X = 8 (from the desk drawer)
- I = X – E (from the vase and cork interaction)
As we will see, these values seamlessly integrate into a final comprehensive code that is central to unlocking the final door.
- E = 5 (from the book matching mini-game)
Step 8: Final Puzzle – Calculating and Entering the Code
The culmination of your efforts in Rooms & Exits Bookstore Chapter 1 Level 24 is solving the final puzzle. All clues and equations come together to form a singular code that unlocks the exit.
- Gathering the Equations:
Let’s revisit the equations:
- From Step 1: E = 5
- From Step 7: X = 8
- From Step 5: I = X – E = 8 – 5 = 3
- From Step 6: T = I / I = 3 / 3 = 1
- From Step 1: E = 5
- Forming the Final Code:
With these values in place, the final code is constructed by placing each number in the order that the game requires. The successful sequence is:
5831 - Entering the Code:
Approach the keypad located near the exit of the Bookstore level. Carefully enter the digits 5831. If every step has been followed correctly, the door will unlock, signifying that you have successfully completed Rooms & Exits Bookstore Chapter 1 Level 24. - Reflecting on the Puzzle Design:
This final step is a masterclass in puzzle integration. It elegantly ties together physical interaction (item collection and usage) with mathematical equations and logical deductions. Such thoughtful design is what makes Rooms & Exits so memorable among puzzle enthusiasts.
Bonus Tips and Tricks: Enhancing Your Escape Room Experience
While the walkthrough above provides you with all the necessary steps to complete the Bookstore level, here are some additional tips and tricks that can elevate your gameplay:
Insider Tips
- Double-Check Every Interaction:
If you have doubts about a step, revisit previous rooms and recheck your inventory. Sometimes, a small overlooked detail can prevent you from moving forward. - Use a Notebook:
Write down every number, color, or symbol you see. This can be especially helpful for puzzles like the colored flags sequence. - Take Your Time:
Escape rooms are designed to make you think outside the box. Patience and deliberate investigation often yield the best results. - Stay Organized:
Keep track of all equations and items as you progress. A simple checklist can be the difference between success and having to backtrack.
Common Pitfalls and How to Avoid Them
Below is a table of common pitfalls and troubleshooting tips, which can help you steer clear of mistakes during your walkthrough:
| Common Pitfall | Reason | How to Avoid |
| Missing a hidden object | Overlooking small details | Thoroughly inspect each area and use a checklist |
| Miscounting colored flags | Rushing through the puzzle | Take your time to count and verify each color count |
| Overlooking the importance of inventory items | Treating items as secondary | Review each item’s purpose in your notes |
| Incorrect combination of clues | Not connecting previously collected clues properly | Cross-check every equation and item combination |
Additional Tables and Lists
Important Equations Table
| Equation Source | Equation | Value |
| Book Matching Puzzle | E = 5 | 5 |
| Vase and Cork Puzzle | I = X – E | 3 (since X=8) |
| Desk Drawer | X = 8 | 8 |
| Chest Puzzle in Hidden Room | T = I / I | 1 |
This table helps to visually organize and remember the equations critical to solving the final exit code.
Key Items Inventory List
- Green Book with a Key Icon
- Curtain Rope
- Teddy Bear (contains half key)
- Knife
- Knob (from the glass cabinet)
- Water Bottle
- Cork (retrieved from the vase puzzle)
- Symbol (hidden behind the picture)
Reviewing this inventory list ensures that no critical object is left uncollected during your gameplay.
The Deeper Insights Behind the Puzzle Design
One of the most fascinating aspects of Rooms & Exits Bookstore Chapter 1 Level 24 lies in its integrative design that forces players to connect disparate elements into a single, cohesive puzzle. This walkthrough not only helps you advance in the game but also offers insight into how modern escape room puzzles are designed. The game blends several cognitive skills including:
- Logical Reasoning: Many puzzles require you to recognize patterns and calculate equations, as seen in the matching of books and the final code calculation.
- Attention to Detail: The deliberate placement of seemingly mundane items (like a green book or a hidden symbol) emphasizes that every detail matters.
- Memory and Pattern Recognition: Challenges like counting colored flags test your ability to recall details accurately.
- Inventory Management and Object Combination: The necessity to combine the half key with the symbol to form a full key underscores the importance of managing your collected items effectively.
This design philosophy makes the game not only enjoyable but a mental workout as well, enhancing critical thinking skills. The journey through Rooms & Exits is filled with surprises each step is meticulously planned to ensure that no clue is wasted and every puzzle contributes to the overall narrative.
Frequently Asked Questions (FAQ)
What should I do if I miss an equation or a clue?
Always backtrack and re-examine the room. Use your notebook or any recorded notes to verify if you skipped a crucial detail. This guide covers all the essentials for the Bookstore level, so recheck the walkthrough steps carefully.
How can I avoid common mistakes in this level?
Pay close attention to inventory items and double-check the colored flag counts. Use the provided inventory and equation tables to review all necessary details before proceeding.
Can I use this walkthrough for other levels in Rooms & Exits?
This guide is specifically tailored for Chapter 1 Level 24 – Bookstore, but many of the principles (such as attention to detail and proper inventory management) are universal across the game. We recommend using a similar approach for tackling puzzles in other levels.
Is there a video version of this walkthrough available?
Yes! For those who prefer a visual guide, you can check out the detailed video walkthrough linked in the post. Watching the video might help clarify any steps that seem ambiguous in text form.
Wrapping Up: Final Thoughts on the Walkthrough
Completing the Rooms & Exits Bookstore Chapter 1 Level 24 is one of the most satisfying experiences in the game. The level smartly blends puzzle-solving, item collection, and the challenge of combining seemingly everyday objects into intricate solutions. By following the step-by-step instructions in this walkthrough, you have unlocked not only the exit code but also a deeper understanding of the underlying puzzle architecture that makes escape rooms so captivating.
Remember, the key to mastering these puzzles is patience, careful observation, and a willingness to explore every detail. With our Rooms & Exits Bookstore Chapter 1 Level 24 Walkthrough, you now have the tools you need to succeed. Enjoy your adventure, and happy escaping!
Final Words
Thank you for reading our comprehensive Rooms & Exits Bookstore Chapter 1 Level 24 Walkthrough here on Walk Through Tip. We trust that our thorough breakdown, detailed item lists, clear tables, and practical tips will help you navigate this intricate level with ease. Always remember that every detail matters in escape rooms, and with a well-planned strategy, even the most daunting challenges can be overcome.
Feel free to leave a comment below if you have any questions or additional tips to share from your own gameplay experience. We love hearing your feedback and learning from every player’s unique journey. Happy escaping, and stay tuned for more walkthroughs and in-depth guides coming your way!