Welcome to our detailed walkthrough for Rooms & Exits Exchange Office Chapter 1 Level 19. In this guide, we aim to provide you with an in-depth understanding of the level’s room layouts, exit strategies, and puzzle solutions. Whether you’re a seasoned player or a newcomer to the game, our comprehensive Rooms & Exits Exchange walkthrough will equip you with the knowledge and strategies needed to conquer this challenging level.
Introduction
The Rooms & Exits Exchange Office Chapter 1 Level 19 Walkthrough is your reliable companion when tackling one of the game’s most intricate challenges. This walkthrough is purpose-built for players who need detailed insights to navigate complex room layouts and overcome seemingly insurmountable puzzles. In Level 19, the design integrates hidden passages, multiple exit strategies, and engaging puzzle mechanics that require both logic and sharp reflexes.
Level Overview
What Makes Chapter 1 Level 19 Unique
Level 19 is notorious for its intricate design and multi-step puzzles. As you progress through the level, you’ll encounter a series of rooms that require both analytical thinking and quick decision-making. The level’s complexity is amplified by:
- Interconnected Room Layouts: Each room connects to the next in unexpected ways, challenging you to remember your previous moves.
- Multiple Exit Paths: Not all exits are immediately accessible; you might need to unlock hidden mechanisms before finding the correct path.
- Puzzle-Centric Obstacles: Many puzzles in this level require specific sequences of actions to unlock progress.
Key Objectives and Goals
Before diving into the detailed room analysis, it is important to establish your primary objectives as you navigate Level 19. These include:
- Identifying and Mapping the Room Layouts: Understand the spatial configuration and how the exits interlink.
- Decoding Puzzle Mechanics: Familiarize yourself with the puzzle patterns and determine the ideal sequence for their activation.
- Optimizing Exit Strategies: Learn which exits offer a direct path forward and which might be red herrings.
- Collecting In-Game Rewards and Bonuses: Discover hidden secrets and power-ups that can make subsequent levels easier.
To provide a clearer picture, consider the table below summarizing the key goals for the level:
| Objective | Description | Benefit |
| Map Room Layouts | Identify each room’s configuration and interconnections | Prevent getting lost in the maze-like design |
| Decode Puzzle Mechanics | Analyze and understand each puzzle before attempting solutions | Saves time and reduces frustration |
| Optimize Exit Strategies | Identify and choose the best exit based on in-game hints and clues | Prevents triggering unintended obstacles |
| Discover Hidden Features & Rewards | Explore for secret areas that yield additional in-game benefits | Enhances player progression with bonus rewards |
Chapter-Wise Breakdown
Chapter 1 – Detailed Analysis
Chapter 1 of the Rooms & Exits Exchange Office series sets the stage for the challenges ahead. In Level 19, this chapter introduces several unique elements that blend exploration with mental challenge.
Room Layout Overview
The architecture of Level 19 is designed to test your spatial awareness. The layout consists of multiple interconnected rooms, some of which are deceptively similar in design. Key points to note include:
- Distinct Zones: The level is divided into several zones, each with a thematic design that provides visual cues for progression.
- Hidden Passages: Not all areas are visible at first glance. Some corridors require solving preliminary puzzles to become accessible.
- Exit Locations: Each room features multiple exits; understanding which door leads to a safe path is crucial.
Here is a simplified diagram to help visualize the room layout:
pgsql
CopyEdit
+———+ +———+ +———+
| Room | –> | Room | –> | Room |
| A | | B | | C |
+———+ +———+ +———+
| | |
Hidden Puzzle Gate Exit
| | |
+———+ +———+ +———+
| Hidden | | Room | | Room |
| Passage | –> | D | –> | E |
+———+ +———+ +———+
Note: This diagram is a simplified representation and may not match the exact complexity of the level design.
Exit Strategies
Unlocking the correct exit is often the difference between moving forward and encountering a dead end. The level includes:
- Primary Exits: Clear, well-marked paths that lead directly to the next challenge.
- Secondary Exits: Less obvious exits that might offer shortcuts if discovered.
- Trap Exits: Exit options that appear promising but can trigger additional puzzles or traps.
A thorough understanding of these strategies is necessary to avoid pitfalls and progress efficiently.
Puzzle Overview
In Chapter 1 Level 19, puzzles are intricately woven into the design. Each puzzle:
- Requires a unique sequence of actions.
- Has visual cues that hint at the solution.
- Often ties back to the overall narrative or theme of the Exchange Office.
To keep track, here’s a summary of typical puzzle types you might encounter:
- Switch Sequence Puzzles: Players must press a series of switches in the correct order.
- Pattern Recognition Puzzles: These require identifying patterns in symbols or colors.
- Hidden Object Puzzles: Items are concealed within the room, and finding them unlocks further progress.
By familiarizing yourself with these puzzle types early on, you’ll be better prepared to tackle them as you move through the level.
Detailed Walkthrough by Room / Exit
Room Navigation Step-by-Step
In this section, we break down the walkthrough room by room, offering a sequential guide that covers room descriptions, puzzle mechanics, and exit directions. Each room is discussed in detail to ensure you do not miss critical cues.
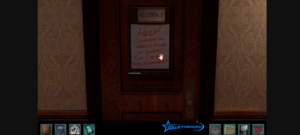
Room 1: The Entrance Chamber
- Description:
The entrance room sets the tone with dim lighting and subtle background music. Here, you immediately notice two distinct doors one leading to a well-lit corridor and another shrouded in partial darkness. - Puzzle Mechanics:
An initial puzzle requires aligning a set of symbols on a wall panel. The symbols hint at directionality, suggesting which door to choose. - Exit / Next Steps:
Once the symbols are aligned correctly, the door to the corridor unlocks. Avoid the dark door as it triggers a trap that delays progression. - Key Tip:
Always check your surroundings for additional clues before making your choice. Use reflective surfaces in the room to see if any details are hidden.
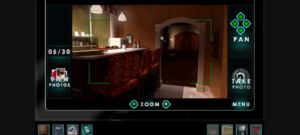
Room 2: The Puzzle Chamber
- Description:
This room is characterized by multiple control panels and a central console that appears to govern several room mechanisms. - Puzzle Mechanics:
Here, you must solve a sequence puzzle by interacting with a series of illuminated buttons. The correct order is indicated by subtle changes in the lighting and background sounds. - Exit / Next Steps:
Completing the puzzle opens an exit door on the left. There are visual cues such as a distinct color on the exit frame that confirm it is the safe path. - Key Tip:
Remain patient and try to discern any recurring patterns. Often, hints come from subtle audio cues that indicate you’re on the right track.
Room 3: The Maze of Corridors
- Description:
As you progress further, the corridors become more labyrinthine. This section is designed to test your navigational skills. - Puzzle Mechanics:
Navigation here is key. Look for wall markings and floor patterns that serve as guidance. Occasionally, a minor puzzle will present itself, such as matching symbols on walls to reveal a hidden doorway. - Exit / Next Steps:
Use the annotated markings on the walls to determine the correct path. Keep an eye out for false exits that may appear to lead forward but return you to an earlier room. - Key Tip:
Mark your progress if you find a safe exit or a passage that loops back, mentally note it or use in-game markers if available.
Room 4: The Secret Chamber
- Description:
Hidden away within Level 19, this chamber is accessible only after solving a secondary puzzle. The room is decorated with intricate art and features a solitary pedestal in the center. - Puzzle Mechanics:
An object-based puzzle here involves examining the pedestal and identifying a correct sequence of interactions between multiple hidden compartments. - Exit / Next Steps:
Once the puzzle is solved, a secret door swings open, offering a shortcut that can save valuable time later in the level. - Key Tip:
Don’t rush the puzzle. Spend time analyzing all elements in the room the visual cues are subtle but crucial for progression.
Must Read Rooms & Exits Chapter 2 Level 5
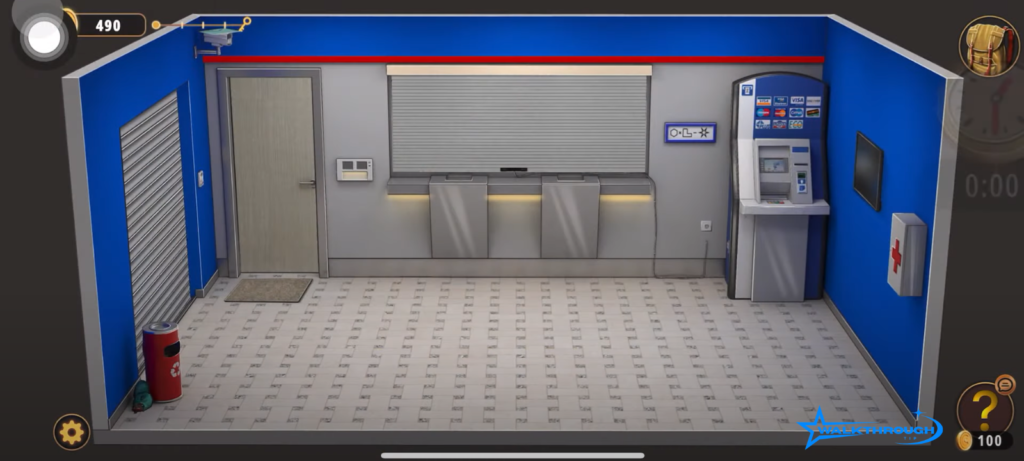
Room 5: The Exit Strategy Hub
- Description:
The final room in the walkthrough segment serves as a hub where multiple exits converge. This room acts as the decision-making center before venturing into the final challenge of Chapter 1. - Puzzle Mechanics:
Here, the challenge shifts from solving individual puzzles to making strategic choices on which exit to take. A final hint on the wall details the safest path if you have accumulated in-game rewards. - Exit / Next Steps:
Follow the guided hints using a combination of previous clues to select the correct exit. Taking the right route will lead directly to the next chapter. - Key Tip:
Review all previous clues and confirm that each switch or puzzle solved aligns with the exit strategy outlined in the room. Consistency is key.
Throughout each room, the process involves methodical exploration and the careful application of logic. By the end of Level 19, you should have a clear understanding of how each element interconnects, providing you with the confidence to overcome any obstacles in your path.
Puzzle Solutions & Tips
Solving puzzles in Rooms & Exits Exchange Office Chapter 1 Level 19 is as much about observation as it is about logic. Here are detailed insights into each puzzle type and practical tips to improve your gameplay:
Individual Puzzle Breakdown
- Switch Sequence Puzzles:
- Description: These puzzles require you to press switches in a specific order.
- Strategy: Look for environmental hints like faded numbers or color-coded buttons. Often, the sequence is hinted at via auditory cues or visual effects in the room.
- Tip: Keep calm and count carefully; one misstep can trigger a reset.
- Description: These puzzles require you to press switches in a specific order.
- Pattern Recognition Puzzles:
- Description: Identify recurring shapes, symbols, or colors.
- Strategy: Write down or visualize the sequence. Use in-game markers or a notepad to track the pattern.
- Tip: Patterns often repeat in cycles; look for a repeating motif.
- Description: Identify recurring shapes, symbols, or colors.
- Hidden Object Puzzles:
- Description: Critical items are hidden in the corners of the room.
- Strategy: Search every nook and cranny. Interact with objects that seem out of place or have a subtle glow.
- Tip: Use a systematic approach start from one corner and sweep through the entire room to ensure nothing is missed.
- Description: Critical items are hidden in the corners of the room.
Gameplay Tips and Practical Advice
- Resource Management:
In many levels, managing resources such as keys, power-ups, or in-game hints is crucial. Keep an inventory, either mentally or via in-game tracking, to avoid reusing precious items in multiple puzzles. - Time Management:
Some puzzles have time-sensitive mechanics. Always be aware of in-game timers and practice a balance between speed and caution. Rushing too quickly may lead to accidental missteps, while too much hesitation can cost you valuable time. - Recording Progress:
Whether you’re playing on a console or PC, taking screenshots or notes on your progress can help you remember vital clues and room configurations for later levels.
Summary Table of Puzzle Tips
| Puzzle Type | Key Strategy | Player Tip |
| Switch Sequence | Follow environmental clues and audio signals | Count carefully and double-check sequences |
| Pattern Recognition | Identify recurring motifs and use notes | Look for repeated patterns and cycles |
| Hidden Object | Explore all corners using a systematic approach | Check unusual spots and compare with visual cues |
Bonus Section: Hidden Secrets & Easter Eggs
No guide on Rooms & Exits Exchange Office Chapter 1 Level 19 would be complete without a look at the hidden secrets and Easter eggs that the level offers. These bonus elements not only reward curious players but can also provide critical advantages in the game.
Hidden Secrets & Rewards
- Secret Rooms:
Some corridors may lead to hidden rooms containing valuable rewards. These rooms are typically accessible only after solving an additional mini-puzzle. - Easter Eggs:
The game developers have hidden references to previous chapters and even subtle hints at the upcoming levels. Keep an eye out for unusual art or sound changes. - Bonus Items:
In certain rooms, extra items like extra keys, hints, or temporary power-ups can be collected. These are often located in areas that appear as distractions from the main puzzle.
How to Spot the Hidden Secrets
- Pay Attention to Details:
Details such as color changes, unusual textures on walls, or slight variations in background music might indicate hidden paths. - Experiment:
Don’t be afraid to interact with objects that seem out of place. Sometimes, even a seemingly decorative element holds the key to unlocking a bonus. - Review:
After completing the level, review your progress to see if there are areas you might have missed. Sometimes a small hint you overlooked can reveal a hidden reward that later pays off.
Conclusion
In conclusion, the Rooms & Exits Exchange Office Chapter 1 Level 19 Walkthrough is designed to be your ultimate guide through one of the game’s most challenging levels. With detailed explanations, step-by-step room navigation, precise puzzle solutions, and bonus tips, this guide provides a complete package for players looking to excel.
To recap, we have covered:
- An Introduction that sets the stage for the walkthrough.
- A Level Overview that outlines the unique aspects of Level 19 and highlights your key objectives.
- A Chapter-Wise Breakdown that details room layouts, exit strategies, and puzzle overviews.
- A Detailed Walkthrough by Room where each room’s challenges and exit paths are methodically explained.
- A comprehensive section on Puzzle Solutions & Tips offering practical advice and strategies.
- A Bonus Section that delves into hidden secrets and Easter eggs that can enhance your gameplay.
Using our guide, players can develop a methodical approach to mastering this level, ensuring that each puzzle is solved with confidence and every secret is uncovered. Remember that the key to success is not just in following instructions but understanding the logic and design behind the challenges.
Frequently Asked Questions (FAQs)
What makes Level 19 so challenging in Rooms & Exits Exchange Office?
Level 19 is challenging because of its intricate room layouts, multiple interconnecting exits, and puzzles that require careful observation and sequential actions. The level demands that players manage in-game resources efficiently and pay close attention to hidden details.
How do I know which exit is the correct one in each room?
Look for visual cues such as distinct colors on exit doors, specific patterns in room design, and subtle hints provided through in-game audio cues. Our walkthrough provides step-by-step directions to help you identify these critical signals.
Are there any hidden rooms in Level 19?
Yes, there are hidden rooms and bonus areas accessible after solving secondary puzzles. These rooms often contain extra rewards and hints that can assist you in progressing through the game.
Can these strategies be applied to other levels in the game?
While some strategies are unique to Level 19, many elements such as efficient resource management, pattern recognition, and methodical exploration apply universally throughout the game.