Welcome to our in-depth guide for Rooms & Exits Jewelry Store Chapter 1 Level 17 Walkthrough. In this comprehensive post, we break down every aspect of the walkthrough, from the initial room layout and item collection to the complex puzzles and final exit. Whether you’re a seasoned player or just starting out with Rooms & Exits, this guide will walk you through step-by-step Read on to discover useful tips, in-game strategies, and a deep understanding of this popular puzzle escape game.
Introduction
Rooms & Exits is a well-known puzzle/escape game that challenges players with a series of intricate puzzles in beautifully crafted environments. In Chapter 1, Level 17 – known as the Jewelry Store – players face one of the most demanding challenges in the game. This walkthrough is designed to help you navigate through the maze of puzzles, from the meticulous item collection to the final exit code entry. We will provide a detailed, narrative explanation combined with bullet lists, tables, and facts to ensure a robust understanding of every step.
Game Background and Context
About the Game
Rooms & Exits is a puzzle escape game developed by WEBELINX GAMES DOO that challenges players to navigate through various themed rooms filled with hidden objects and complex puzzles. The game requires keen observation, logical reasoning, and the ability to combine items from your inventory to progress. What sets Rooms & Exits apart is its unique blend of hidden object challenges and environment-based puzzles that test your attention to detail and critical thinking.
Chapter & Level Context
Chapter 1 Level 17 – the Jewelry Store – is a standout level within the game due to its multifaceted puzzles and the intricate layout of the store. This level requires not only rapid item collection but also precise puzzle solving, where every collected object has a specific purpose in unraveling the mystery of the escape room. As you progress, you must pay attention to clues that are both visual and numerical, with the final exit code being the culmination of various smaller puzzles. By understanding the context of the level – the themed jewelry store environment with its elaborate design – players can better appreciate and execute the required tasks.
Key facts about this level:
- Theme: Jewelry Store with luxurious decor and hidden treasures.
- Primary Challenges: Item collection, color matching puzzles, and code deciphering.
- Final Exit Code: The crucial combination needed to escape the store.
- Competitive Insight: Our competitor outlines similar steps but may leave out nuanced details; here, we dive deeper into each puzzle element to give you a winning edge.
Walkthrough Structure Overview
Before diving into the step-by-step instructions, it’s important to understand how this guide is organized. This walkthrough is divided into several key sections that align with the structure of the level:
- Initial Room – The Jewelry Store Setup: A detailed look at the first area you encounter, including the layout and the starting items.
- Puzzle 1 – Matching Jewelry and Gemstones: Explanation of the first major puzzle that involves collecting gems and matching them with clues.
- Puzzle 2 – Interacting with Environmental Objects: Covers how to use collected items in conjunction with interactive objects to progress.
- Puzzle 3 – The Hexagonal and Color Matching Challenge: Outlines the multi-step puzzle involving hexagons, colors, and numerical hints.
- Final Puzzle – The Exit Code Challenge: Guides you through combining clues and entering the correct exit code to complete the level.
- Additional Tips and Common Issues: Helpful advice and frequently asked questions to troubleshoot common challenges.
- Conclusion and Further Resources: A summary of key takeaways with a call-to-action for further engagement.
Each section is filled with detailed instructions and supportive lists, ensuring that you can follow along smoothly even during the most challenging parts.
Detailed Walkthrough Section
1. Initial Room – The Jewelry Store Setup
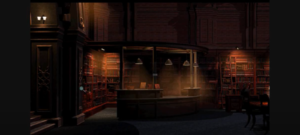
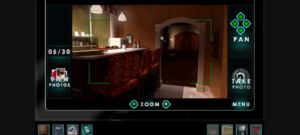
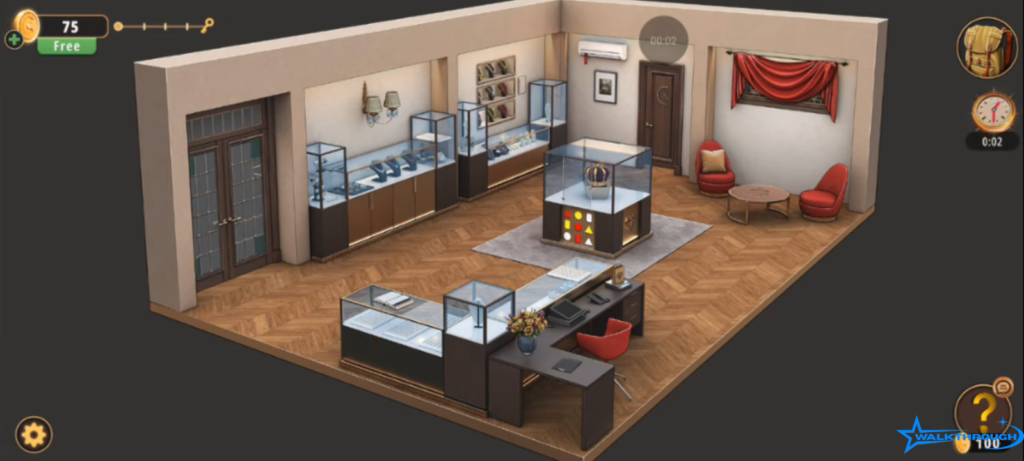
Upon entering the Jewelry Store level, you’ll face a beautifully rendered environment that hides many essential clues. The first part of the walkthrough revolves around understanding the layout of the room and identifying the critical items you need to collect.
Room Layout and Essential Items
When you first step into the store, you will notice several key locations and objects. Here’s a table summarizing the items to collect in this initial room:
| Location/Object | Item to Collect | Purpose |
| Jewelry Case near Glass Doors | Green Precious Stone (from bracelet) | Unlock puzzle steps; hints at color matching |
| Counter Area | Rolled Money Bill | Used later in the combination of items |
| Necklace Case (with three necklaces) | Red Ruby from the last necklace | Part of the gemstone matching puzzle |
| Lamp on the Wall | Blue Diamond and another rolled bill | Clue for another puzzle sequence |
| Cupboard under the Necklace Case | Camera (to dismantle for batteries) | Needed to power up remote-controlled elements |
| Book on the Counter | Paper with three holes | Clue for a subsequent puzzle related to code |
As you explore this room, take your time to note the objects, as every item you collect plays a pivotal role later on. The designer has crafted this environment to test your ability to notice the little details that are crucial to your escape.
Item Collection Process
Make sure to follow these steps methodically:
- Tap on the Jewelry Case: Begin at the double glass doors and tap on the jewelry case to obtain the bracelet with the green precious stone and a rolled money bill.
- Collect from the Necklace Case: Move next to the necklace display and tap to extract the red ruby from the final necklace.
- Interact with the Lamp: Click the wall-mounted lamp to pick up the blue diamond and an additional rolled money bill.
- Use the Cupboard: Tap the cupboard beneath the necklace case to get the camera – later dismantle this for batteries.
- Book Inspection: Finally, check the book on the counter to secure the paper with three holes.
Each collected item is vital. Not only does the process kickstart the level, but it also introduces you to the idea of combining items from different sources to reach subsequent puzzles.
2. Puzzle 1 – Matching Jewelry and Gemstones
After successfully gathering your initial items, the first major puzzle begins. This segment of the level revolves around matching precious stones with specific clues provided by the game. The clues are often embedded in the environment, such as the diamonds found under the crown or color cues from various objects.
Puzzle Mechanics and Explanation
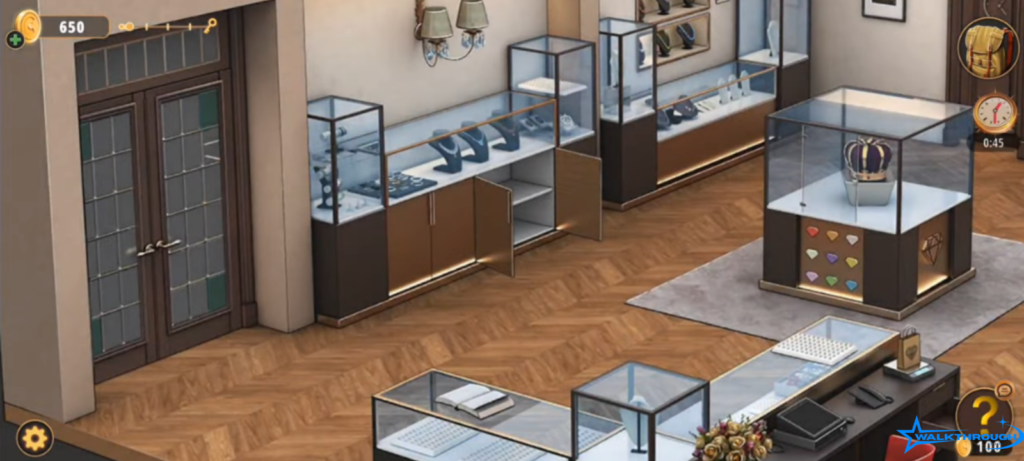
The primary objective in this puzzle is to align the collected gemstones according to the patterns or colors indicated by the surrounding decor. You will see that the room features a crown with nine small diamonds placed underneath it. These diamonds serve as the reference pattern for arranging the pearl necklaces along the left wall of the store.
Step-by-step instructions:
- Observe the Diamonds: Notice the arrangement and the color sequence of the nine diamonds under the crown.
- Arrange the Pearl Necklaces: On the left wall, you’ll find pearl necklaces. Rearrange them carefully so that the colors reflect the pattern shown by the diamonds.
- Secret Drawer Reveal: Once the necklaces are correctly aligned, a secret drawer will appear, granting you a key crucial for later puzzles.
Detailed Explanation in Paragraph
This segment is often the first true test of your attention to detail. The pattern presented by the diamonds isn’t random it represents the precise order needed to unlock an additional key. It may be tempting to rush through this process, but taking your time and verifying the color order will save you from frustrating mistakes later. Some players even find it helpful to sketch the diamond arrangement on a piece of paper before reordering the necklaces in-game. Keeping track of every color sequence is vital, as it will likely inform both current and upcoming puzzles.
Tips:
- Double-check alignment: If the secret drawer does not appear after your first attempt, reset the arrangement and cross-check the colors carefully.
- Use visual aids: Consider using screenshots or even your phone’s camera to capture the diamond pattern.
- Stay patient: As with many puzzles in Rooms & Exits, patience is key.
3. Puzzle 2 – Interacting with Environmental Objects
After the gemstone matching puzzle, the game transitions to another phase where you have to interact with various environmental objects. Here, the focus is on combining previously collected items and utilizing interactive game elements to progress.
Key Interactions and Item Combinations
The second puzzle requires you to combine items and solve sequential puzzles. The camera collected earlier from the cupboard is now dismantled to provide batteries. These batteries are essential for powering a remote controller.
Step-by-step Breakdown:
- Dismantle the Camera: Open your inventory and select the camera. Dismantle it to obtain batteries.
- Power the Remote: Take the batteries and combine them with the remote controller found in the desk drawer.
- Activate the Air Conditioning: Use the powered remote on the air conditioner. This not only triggers an animation but also provides you with a red ribbon.
- Open the Register: With the desk drawer key obtained earlier, unlock the register and discover an important image that contains another piece of the puzzle.
- Combine Rolled Bills: Dismantle and combine the rolled money bills. This bundled note then serves to unlock further interactions, such as the plug that needs to be connected to the register.
A Detailed Narrative on Environmental Interaction
Interacting with the environment in this section is a multi-step process that teaches players the value of item combination and order of operations. The use of a dismantled camera to obtain batteries is a clever way of integrating resource management into the puzzle-solving dynamics. It reflects the game designers’ intent to merge narrative exploration with logic puzzles. Each combined item serves as a stepping stone first, you power the remote, then use it to activate larger environmental devices like the air conditioner, which in turn reveal hidden items such as the red ribbon. The cumulative nature of these interactions means that precision is essential; every action must be deliberate and well-planned.
Lists for Clarity:
- Items to Use:
- Camera: Dismantle for batteries.
- Batteries + Remote: Powers the remote.
- Rolled Money Bills: Combine to create a note bundle.
- Key from Desk Drawer: Opens the register.
- Camera: Dismantle for batteries.
- Objects to Interact With:
- Air conditioner (for red ribbon).
- Register (for the secret image).
- Plug and socket arrangement (to complete the register’s circuit).
- Air conditioner (for red ribbon).
Useful Fact:
Many players have reported that failing to combine the rolled bills correctly results in starting over, so take extra care during this process.
4. Puzzle 3 – The Hexagonal and Color Matching Challenge
As you progress further into the level, you enter one of the most intricate parts of the walkthrough: the hexagonal and color matching challenge. This multi-part puzzle demands both spatial reasoning and color logic, drawing you deeper into the game’s layered complexities.
Puzzle Components and Breakdown
This puzzle can be divided into several interconnected parts:
- Hexagonal Pieces Collection: You need to gather several hexagonal pieces scattered throughout the store. These pieces are hidden in various objects, like a trash bin, a table drawer, and even within the book on the counter.
- Scissors and Magazine Interaction: In one section, you must remove a corner from a rug to collect scissors. Combining these scissors with the magazine yields another hexagonal piece.
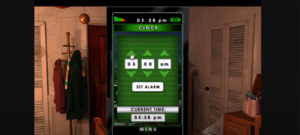
- Clock Puzzle: The watch case in the middle of the room and a wall clock are essential here. Note down the specific times displayed, as they are used later to form a time code.
- Numerical Clue – 12.58: By interacting with these puzzles, you eventually deduce the significant number “12.58,” which is the combination required for unlocking a suitcase.
Step-by-Step Instructions and Table
Below is a table summarizing the hexagonal puzzle steps and their purpose:
| Puzzle Element | Action Required | Outcome/Clue |
| Hexagonal Pieces | Collect from trash bin, table drawer, and pot (after tapping) | Additional hexagonal piece |
| Rug Corner Removal | Remove top left corner with a scissor obtained | Gains scissors; combine with magazine |
| Clock and Watch Puzzle | Note times on various clocks and watch cases | Derives key time codes (e.g., 09:20, 03:38) |
| Suitcase Combination | Combine time codes to form “12.58” | Unlocks the suitcase to get another piece |
Detailed Explanation in Paragraph Form:
In this stage, the designer merges the traditional hidden object search with a more intricate color and shape matching challenge. The hexagonal puzzle is not just about collecting pieces; it also involves understanding the relationships between the colors represented on these pieces and the spatial arrangement suggested by items like the watch case. For instance, each hexagonal piece might represent a different facet of the overall combination puzzle, and using the scissors to cut out a necessary piece from the magazine introduces a creative, almost craft-like element. The reveal of the number “12.58” acts as a cornerstone clue for the subsequent final puzzle, setting a precedent for multi-layered problem-solving throughout the level.
Tips for Success:
- Double-check your collection: Ensure that all hexagonal pieces are accounted for before proceeding.
- Take notes of the times: It is advisable to write down the times that appear on the clocks; these numbers are crucial to solving the time-based puzzle later.
- Reset if necessary: If the pieces don’t seem to align properly, revisit the steps to ensure no component was overlooked.
5. Final Puzzle – The Exit Code Challenge
After navigating through the multiple puzzles, you finally arrive at the final challenge: unlocking the door to exit the Jewelry Store. This concluding puzzle combines previous elements and requires you to input the correct exit code derived from your earlier steps.
Breakdown of the Final Steps
Here’s the sequential process for tackling the final puzzle:
- Combining All Elements:
- Use the key obtained from the secret drawer revealed during the gemstone matching phase.
- Make sure you have dismantled and combined all rolled money bills correctly, and utilize the plug connected to the register.
- Use the key obtained from the secret drawer revealed during the gemstone matching phase.
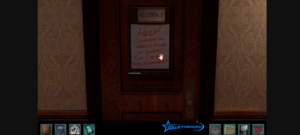
- Input Code – 9816:
- The exit door requires a numerical code. After successfully activating the register and combining the clues, the code “9816” is presented as the answer.
- You must enter this code into the exit door panel in the correct order. Some walkthroughs note that an image appears which acts as a visual reminder of the code’s position.
- The exit door requires a numerical code. After successfully activating the register and combining the clues, the code “9816” is presented as the answer.
- Final Key Usage:
- Once the correct number is entered, the door reveals a padlock. Use the key from the register drawer to unlock it.
- Finally, interact with the door’s plug to open it, which leads to your escape.
- Once the correct number is entered, the door reveals a padlock. Use the key from the register drawer to unlock it.
Detailed Narrative and Practical Tips
In this climactic stage, every previously collected and assembled clue comes together. The designer intentionally layers the puzzles so that the exit code is a cumulative result of multiple earlier tasks. As you input “9816” into the door panel, you are not just entering a number – you are finalizing a long trail of puzzles that required attention to detail, methodical item collection, and precise execution of every hint provided along the way.
Key actions to remember:
- Combine the money bills correctly: Misaligning the bills could result in entering the wrong sequence.
- Verify the image clue: Before entering the code, double-check that the secret image matches with “9816.”
- Use the final key properly: Ensure that you’re using the correct key on the padlock; sometimes multiple keys can be confusing.
Below is a checklist table summarizing the final step requirements:
| Final Step Component | Action Required | Outcome |
| Money Bills Combination | Combine dismantled money bills | Forms bundled note used in plug activation |
| Register Activation | Plug in and activate using key | Displays the final image and code clue |
| Code Entry | Input code “9816” | Unlocks the exit door panel |
| Final Key Utilization | Use key from the desk drawer on padlock | Opens the padlock and allows escape |
Tips and Common Issues
Even the most experienced players might encounter snags during this challenging level. Below are some additional tips and solutions to help troubleshoot common issues:
Troubleshooting Steps
- Recheck Your Inventory:
Before proceeding with any puzzle, open your inventory and ensure that you have all essential items. Missing even one component can result in failure to progress. - Reset Puzzle Arrangements:
If you find that a secret drawer or code isn’t revealing itself as expected, re-assess the arrangement of colors or the combination of items. Sometimes it’s best to reset certain puzzles and start again. - Double-check Puzzle Clues:
Look back at clues in the environment such as the diamond patterns under the crown or the times displayed on clocks. They are usually consistent – if something seems off, there’s often a clue you might have initially missed.
Frequently Asked Questions (FAQ)
What if the secret drawer doesn’t open after arranging the necklaces?
Double-check the color order; even a slight misalignment can cause the drawer to remain closed. Use visual aids (like screenshots) if necessary.
How do I know if I’ve combined the rolled bills correctly?
The game will usually give you a prompt or display an image once the bills are correctly combined. If you don’t see any changes, revisit your inventory and try rearranging them.
Is there any trick to the hexagonal puzzle?
Yes. Make sure to follow the proper sequence while collecting all hexagonal pieces, and don’t rush through the process. Writing down the sequence of colors and shapes can help immensely.
Common Issues Table
| Issue | Possible Cause | Solution |
| Secret drawer not opening | Misalignment of necklace colors | Reorder the necklaces according to the diamond pattern |
| Incorrect code input | Mistakes in combining money bills or misreading the image | Revisit the register setup and double-check the secret image clue |
| Hexagonal pieces missing | Overlooked item in the environment | Re-explore area; use checklist to verify all collected items |
| Final key not working | Wrong key usage or wrong sequence | Verify inventory for duplicate keys and re-read the combination instructions |
Conclusion
In summary, our step-by-step Rooms & Exits Walkthrough for Rooms & Exits Jewelry Store Chapter 1 Level 17 is designed to make even the most complex puzzles accessible. This guide has detailed every aspect of the level from careful item collection and challenging gemstone matching to intricate hexagonal puzzles and the final exit code input. The key to success in this level is careful observation, methodical execution, and the willingness to revisit and verify every step.
By following this guide, you should now be well-equipped to navigate the Jewelry Store level with confidence. Whether you’re struggling with aligning the necklaces, combining items, or entering the final code, remember that each puzzle is interlinked and every detail matters. We invite you to leave feedback in the comments section below if you have additional tips or if you encounter any specific issues not addressed here. Also, feel free to explore our other walkthroughs on Walk Through Tip for more detailed guides on different levels and chapters of Rooms & Exits.