In Part 10 of Nancy Drew: Warnings at Waverly Academy, you’ll encounter one of the most elegant yet puzzling challenges in the game: the Piano Puzzle. This section goes beyond the basics, offering musical context, clue interpretation, and a detailed, step-by-step solution tailored to this iconic moment. For those looking to master every twist and turn of the mystery, this walkthrough is part of our game complete guide for Warnings at Waverly Academy, where we cover every puzzle, clue, and storyline detail to help you solve the case from start to finish.
🎬 Introduction: Why the Piano Puzzle Matters
By the time Nancy Drew reaches the rec room in Warnings at Waverly Academy Part 10, she has already uncovered hidden journals, cracked coded letters, and navigated secret passages. Yet nothing has prepared her, or you, for the melodic enigma waiting at the grand piano. Unlike typical action‑driven puzzles, the Nancy Drew piano puzzle demands both observation and a basic understanding of music theory. It’s a perfect blend of story and gameplay that exemplifies why the Nancy Drew series remains a fan favorite.
In this guide, we’ll unravel how the piano puzzle fits into the overarching narrative, walk through locating and interpreting clues, explain the in‑game piano layout, and provide crisp, step‑by‑step instructions to solve the puzzle without frustration. Along the way, you’ll learn about common pitfalls, the hidden symbolism behind the melody, and even how to optimize your own content if you’re creating a Waverly Academy puzzle guide yourself.
🔍 Recap: Where We Are in Part 10 of the Walkthrough
In Parts 1–9 of the Nancy Drew walkthrough, Nancy infiltrated Waverly Academy under the guise of a music scholarship student. She befriended classmates, eavesdropped on faculty, and collected fragments of evidence suggesting that “The Black Cat” is orchestrating threats from within the school.
- Part 1–3: Introduction to characters like Rachel and Mel; initial threats appear.
- Part 4–6: Search of dorm rooms yields coded letters and a cipher key.
- Part 7–9: Library research uncovers a connection between Waverly’s founders and a secret society.
Now, in Part 10, Nancy must use a sheet of cryptic sheet music she recovered from a hidden compartment to unlock another secret, and the grand piano in the rec room holds the key.
🧩 Locating the Puzzle & Gathering Clues
Before you can play a single note, you must gather all relevant clues scattered across Waverly Academy. Skipping this step leads to guesswork, wasted attempts, and disappointment.
- Library Journal
- Search for the founder’s diary in the restricted section.
- Inside, find a poem that references musical terms: “Let the chord of truth ring forth where the cat’s lament is heard.”
- Search for the founder’s diary in the restricted section.
- Dormitory Lockers
- Rachel’s locker hides a torn sheet of music with partial notation.
- Mel’s locker may contain a second fragment showing accidentals (sharps/flats).
- Rachel’s locker hides a torn sheet of music with partial notation.
- Hidden Audio Recording
- Under a loose floorboard near the practice rooms, discover an old cassette tape.
- Playing it on the rec room’s tape recorder reveals the melody Nancy must reproduce.
- Under a loose floorboard near the practice rooms, discover an old cassette tape.
| Clue Source | Location | Notes |
| Founder’s diary poem | Restricted library section | Metaphorical hints to note sequence |
| Torn sheet music | Rachel’s locker | First half of the melody; natural notes only |
| Audio cassette fragment | Floorboard in practice room | Confirms rhythm and timing; includes a sharp on G# |
🎹 Understanding the Piano Layout
The in‑game piano interface mirrors a real grand piano but without labels. Here’s what you need to know:
- White keys represent the natural notes: C, D, E, F, G, A, B.
- Black keys represent sharps/flats: C♯/D♭, D♯/E♭, F♯/G♭, G♯/A♭, A♯/B♭.
- The pattern of two black keys followed by three black keys repeats across the keyboard, this visual grouping helps you locate Middle C (the white key immediately to the left of the pair of black keys in the center).
Fact: Middle C is often marked on sheet music with a special ledger line. In Waverly’s piano puzzle, it’s your starting point for accurate pitch.
Piano Key Reference Table
| Note | Key Color | Position Description |
| C | White | Immediately left of two black keys |
| D | White | Between the two black keys |
| E | White | Immediately right of the two black keys |
| F | White | Immediately left of the three black keys |
| G | White | Between first and second of three blacks |
| A | White | Between second and third of three blacks |
| B | White | Immediately right of three black keys |
🔑 Step‑by‑Step Solution for the Waverly Academy Piano Puzzle
With clues in hand and an understanding of the keyboard, you’re ready to solve the Nancy Drew piano puzzle.
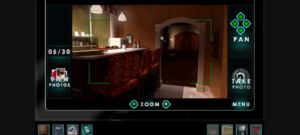
- Approach the Piano
In the rec room, interact with the grand piano to open the musical interface.
Load the Clues
Re‑examine the sheet music and poem side by side. Identify the six‑note sequence:
mathematica
CopyEdit
C – E – G – G♯ – E – C
- (The sharp on G♯ comes from the audio fragment you found.)
- Locate Middle C
Click on the white key immediately left of the central pair of black keys. - Play Each Note in Sequence
- C (Middle C)
- E (two white keys to the right)
- G (four white keys to the right)
- G♯ (first black key to the right of G)
- E (back to the third white key)
- C (return to Middle C)
- C (Middle C)
- Timing & Rhythm
- Follow the beat you heard on the cassette tape. Each note holds for one beat, with a brief pause before the final C.
- Follow the beat you heard on the cassette tape. Each note holds for one beat, with a brief pause before the final C.
- Confirmation
A soft chime and a subtle animation confirm success. The piano lid creaks open to reveal the hidden compartment.
Pro Tip: If you misclick, the sequence resets. Take a breath, re‑center on Middle C, and start again, accuracy over speed.
🗝️ Aftermath: What the Puzzle Unlocks
Solving the piano puzzle rewards you with one of three possible outcomes, depending on minor variations in your clue‑gathering path:
- The Black Cat’s Letter: A taunting note signed by the antagonist, hinting at the next location.
- Skeleton Key: Opens a locked door in the East Wing, leading to a secret archive.
- Founding Seal: A medallion etched with the Waverly crest, required to operate a hidden mechanism in the headmistress’s office.
Each outcome propels Nancy closer to unmasking “The Black Cat” and ties back into earlier references. This puzzle isn’t an isolated challenge; it interlocks with the game’s central theme of secrecy and hidden truths.
📌 Common Mistakes & How to Avoid Them
Even seasoned sleuths stumble here. Below are the top five pitfalls, and how to avoid them:
- Skipping the Audio Clue
- Mistake: Relying solely on sheet music fragments.
- Fix: Always collect the cassette tape; it confirms accidentals.
- Mistake: Relying solely on sheet music fragments.
- Incorrect Octave
- Mistake: Playing the sequence an octave too high or low.
- Fix: Always start at Middle C; reference the visual pattern of black keys.
- Mistake: Playing the sequence an octave too high or low.
- Overlooking Sharps/Flats
- Mistake: Treating the puzzle as all-natural notes.
- Fix: Cross‑reference the coded poem’s phrasing (“a hiss between G’s”) to spot G♯.
- Mistake: Treating the puzzle as all-natural notes.
- Rushing Through
- Mistake: Clicking rapidly and ignoring rhythm.
- Fix: Emulate the tempo you heard in the rec room’s tape recorder.
- Mistake: Clicking rapidly and ignoring rhythm.
- Misidentifying Middle C
- Mistake: Choosing a white key in the wrong black‑key grouping.
- Fix: Remember: Middle C is immediately left of the two black keys in the center.
- Mistake: Choosing a white key in the wrong black‑key grouping.
Read also: Nancy Drew: Warnings at Waverly Academy (Part 9) – Is Mel a Plagiarist?
🔍 Deeper Meaning: Symbolism Behind the Melody
The Waverly Academy piano puzzle isn’t just a gameplay obstacle, it’s steeped in narrative symbolism:
- Harmony vs. Discord: The melody moves from consonant intervals (C–E–G) to a dissonant G♯, mirroring Nancy’s shift from comfort to danger.
- Repetition & Reflection: The return to E and C suggests looking back at earlier clues, an echo of the diary entries Nancy read.
- Hidden Catharsis: Unlocking the puzzle compels players to recognize that beneath Waverly’s pristine reputation lies hidden tension.
🎤 Final Thoughts
The Piano Puzzle in Nancy Drew: Warnings at Waverly Academy exemplifies the series’ unique fusion of storytelling and puzzle design. By weaving together cryptic clues, atmospheric audio, and an elegant musical interface, the game challenges players to think like detectives and musicians simultaneously.
This guide has given you all the tools, clue locations, keyboard fundamentals, and step‑by‑step instructions to conquer the puzzle on your first try. More than that, it’s shown how each note and lyric ties into the larger narrative of secrets, trust, and revelation. When you solve this puzzle, you’re not just earning an item; you’re proving your mastery of Nancy Drew’s world.