Introduction
Welcome to Rooms & Exits Level 8, where you’re transported into the vibrant chaos of a Toy Store. This level stands out for its multi‑room design, weaving together a series of hidden‑object hunts, mechanical puzzles, and pattern‑matching challenges. From assembling arrows and popping balloons to arranging fruit by color and illuminating a dollhouse, every corner of the store conceals a clue vital to your escape. Succe ss demands keen observation, inventive item use, and logical deduction skills you’ll hone as you progress. In this in‑depth guide, we’ll walk you through each room, explaining not just the “how” but the “why” behind every solution, so you can master the Toy Store’s secrets and break free with confidence .
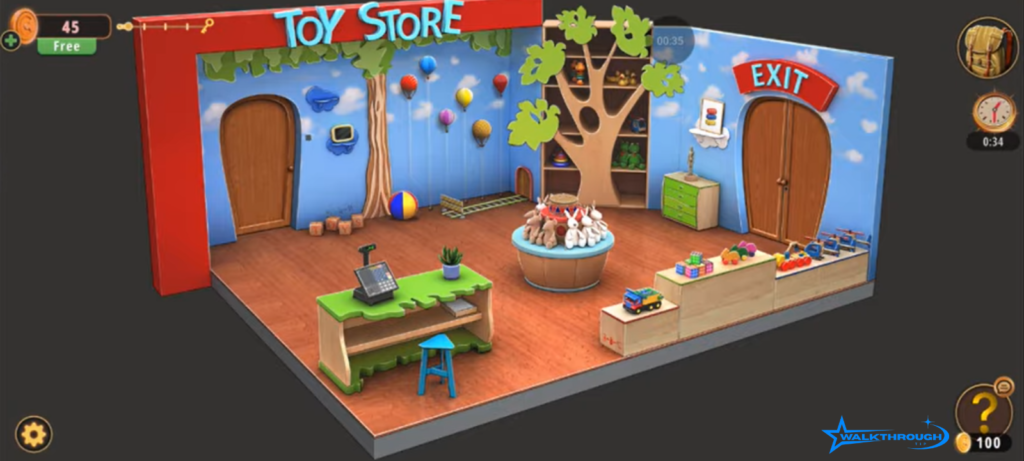
First Room: Initial Exploration and Puzzle Solving
The Toy Store’s main entrance room is deceptively playful, yet every toy and fixture hides a piece of the escape puzzle. Begin by systematically scanning the environment to collect initial items:
- Cube Puzzle & Triangle Block
A colorful cube puzzle rests atop a display box near the entrance. Tap to add it to your inventory. Below it, a small truck toy conceals a triangle block tap the truck’s side to retrieve this angular piece. - Hairdryer & Drawer Items
On the main table sits a toy hairdryer. Tap to collect it; you’ll later dismantle it for wiring. Adjacent to this, a wardrobe hides a locked drawer. Open it to find a drawer handle and a loose arrow tip. - Capsicum & Arrow Rubber
A whimsical paper tree display conceals an unexpected capsicum and a fragment of rubber tap behind the foliage to gather these items.
With these in hand, you’re ready to tackle the room’s signature puzzles:
Solve the Arrow Puzzle
Using the arrow tip and rubber fragment:
- Combine the two in your inventory (select arrow tip, then rubber, then “Combine”) to forge a complete arrow.
- Use this arrow on the red balloon suspended from the ceiling. A successful pop reveals a crumpled piece of paper bearing a cryptic pattern.
This puzzle exemplifies Rooms & Exits’ emphasis on inventory combination and environmental interaction you must create the tool (arrow) before you can use it to unlock the next clue .
Truck Block Puzzle
The paper from the balloon maps directly to the truck block puzzle:
- Place the triangle block on the miniature truck’s loading bed.
- Refer to the pattern printed on your paper: a grid of colored shapes indicating where to position the cube pieces.
- Arrange the cube puzzle segments on the truck until they mirror the pattern exactly.
Upon correct placement, the truck’s back hatch pops open, depositing a small key into your bag your first mechanical key, essential for unlocking the wardrobe. This sequence reinforces the concept of pattern replication common in escape‑room design .
Hairdryer and Device Activation
Finally, dismantle the hairdryer:
- In your inventory, select the hairdryer and tap Dismantle. You’ll obtain a wire piece.
- Return to the device mounted near the left wall its panel is loose. Use the wire on the device to reconnect its circuitry.
- Observe the toy’s mechanical arm movements and the paperboard clue on the adjacent table. These indicate the passcode “TRAIN” which you enter on the device’s keypad.
Entering “TRAIN” unlocks a sliding door into the second room, blending tool creation, wiring puzzles, and code entry into one fluid challenge
Second Room: Advanced Puzzles and Hidden Objects
The second showroom brims with larger toys tricycles, doll displays, and more each concealing new items and puzzles.
Collecting Items
- Doll with Green Shirt
On a pedestal near the entrance, a doll dressed in green sits primly. Tap to collect it later, you’ll groom it for a hidden piece. - Mango & Paper Fragment
In the cupboard behind a rack of blue‑boxed dolls, move the front row aside to reveal a mango and a torn paper fragment. The mango becomes part of a fruit‑arrangement puzzle, while the paper yields a clue when assembled later.
Fruit Arrangement Puzzle
A bucket on the right side awaits your harvested fruits:
- Place the capsicum, mango, and any other fruit you’ve collected (e.g., strawberry from an earlier room) into the bucket.
- Arrange the fruits in order of the blue doll box colors the boxes are numbered and color‑coded, offering the sequence.
Correctly ordered, the bucket’s lid pops open, revealing a hand‑drawn image depicting a specific lighting pattern for the dollhouse across the room. This puzzle highlights the game’s use of indirect environmental clues you interpret box colors to unlock a separate mechanism .
Dollhouse Light Puzzle
The dollhouse on the left wall features five windows:
- Refer to the image obtained from the fruit bucket, which shows which windows to illuminate.
- Tap the dollhouse’s light switch and then each window in the indicated pattern (e.g., top‑left, bottom‑right, center).
When the pattern is correct, a secret compartment in the dollhouse floor opens, depositing a comb and a second key. The comb will groom your doll; the key unlocks the board puzzle area.
Combining Items & Board Drawing Puzzle
Return to your inventory:
- Combine the comb with the doll, then tap Examine to find a puzzle piece hidden in its hair.
- Assemble the two torn paper fragments (from balloon and fruit puzzles) by selecting them both and tapping Combine, revealing a complete blueprint image.
Head to the drawing board mounted next to the exit door:
- Tap the board and use the on‑screen stylus to replicate the blueprint’s four icons in sequence.
- Upon success, the board clicks open, providing a set of colored blocks and a spray bottle.
This multi‑layered challenge fuses inventory combination, examination, and on‑screen drawing, showcasing the level’s depth .
Cleaning the Mirror & Unlocking the Second Door
A heart‑shaped box on the table bears a fogged mirror:
- Collect a yellow cloth from a drawer in the second room.
- Combine it with the spray bottle in your inventory to create a cleaning rag.
- Use the rag on the mirror to wipe away grime, revealing a code pattern etched beneath.
This pattern corresponds to colored tiles on the second door’s keypad:
- Enter the sequence (e.g., blue, red, green, yellow) as indicated by the mirror etching.
- The door unlocks, granting access to the third room.
This final puzzle in Room 2 blends cleaning mechanics with color code entry, a clever twist on typical escape‑room interactions .
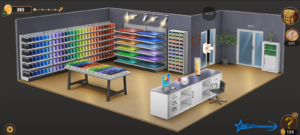
Third Room: Final Challenges and Escape
The third and final chamber houses a series of balloon puzzles and the ultimate door lock.
Balloon Position Puzzle
The back wall displays six balloons, each tethered at different heights:
- Observe their relative positions and the dotted line chart on a nearby panel.
- Recreate these positions on the panel’s digital interface by dragging virtual balloon icons to match the real ones.
When all six align, the interface beeps and displays the final key in a small compartment beneath.
Exiting the Toy Store
With the final key in hand:
- Approach the main exit door’s ornate lock.
- Insert the key and turn it listen for the satisfying click.
- Push the door open and step through, triumphant in your escape from the Toy Store.
This concluding act ties together every puzzle strand from arrows and trucks to dollhouses and balloons into a cohesive finale
Items & Locations Table
| Item | Location | Purpose |
| Cube Puzzle | Box near entrance | Truck block puzzle |
| Triangle Block | Side of toy truck | Truck block puzzle |
| Arrow Tip & Rubber | Behind paper tree | Combine into arrow for balloon puzzle |
| Complete Arrow | Inventory | Pop red balloon |
| Paper Fragment #1 | From popped balloon | Truck block pattern |
| Truck Key | Truck block puzzle completion | Unlock wardrobe |
| Hairdryer | Main table | Dismantle for wire |
| Wire Piece | From hairdryer | Repair device |
| Device Code “TRAIN” | Device keypad | Unlock second room |
| Doll (Green Shirt) | Second room table | Combine with comb for puzzle piece |
| Mango & Fruit | Cupboard in second room | Fruit arrangement puzzle |
| Paper Fragment #2 | From fruit bucket | Dollhouse light pattern |
| Comb | Dollhouse puzzle | Groom doll for puzzle piece |
| Puzzle Piece #3 | From comb + doll | Combine with other fragments for blueprint |
| Blueprint | Combined paper fragments | Board drawing puzzle |
| Colored Blocks | From board puzzle | Final drawing puzzle |
| Spray Bottle | From board puzzle | Clean mirror |
| Yellow Cloth | Drawer in second room | Combine with spray to clean mirror |
| Final Key | Balloon position puzzle | Unlock exit door |
Expert Tips & Tricks
- Systematic Zone Clearing
Divide the Toy Store into three zones Entrance Room, Second Room, Final Room and clear each fully before moving on. - Inventory Mastery
Familiarize yourself with the four bag actions Use, Combine, Dismantle, Examine to unlock hidden interactions efficiently. - Pattern Recognition
Pay close attention to subtle visual cues: balloon heights, fruit bucket colors, and blueprint icons. These often guide puzzle solutions. - Revisit and Re‑scan
After solving a puzzle (e.g., dressing mannequins), always revisit the area. New items or compartments frequently become accessible. - Note‑Taking
Keep a quick notepad of codes, patterns, and sequences especially for multi‑step puzzles to avoid costly resets.
Conclusion
Rooms and Exits Level 8 – Toy Store masterfully combines hidden‑object mechanics, inventory puzzles, and interactive mini‑games within a playful retail setting. By following this guide assembling arrows, solving truck and dollhouse puzzles, arranging fruit, and mastering balloon positions you’ll navigate every twist and trap with confidence. Now step through that exit door and prepare for the next adventure in Chapter 2 Level 9: Backyard!