1. Introduction to The Painscreek Killings
The Painscreek Killings is a first-person investigative game released in 2019 that casts you as Janet Kelly, an intrepid reporter determined to uncover the truth behind the gruesome murder of Vivian Roberts. Combining non‑linear exploration with puzzle‑driven storytelling, this mystery title challenges you to sift through diaries, letters, and locked safes across a deserted town. Unlike linear “hint arrow” games, this Painscreek Killings full walkthrough gives you the freedom and the responsibility to connect the dots yourself. By the end of this guide, you’ll have expert insight into every clue, key, and secret passage, enabling you to complete the game without ever feeling stuck.
2. Getting Started: Your Role as a Journalist
Before diving into the town, familiarize yourself with your primary tools:
- Camera: Photograph documents, key items, or suspicious areas. All photos auto‑catalog in your inventory.
- Notebook: Automatically logs major clues; you can add manual notes for cross‑referencing.
- Inventory: Holds keys, letters, and evidence. Organize it to avoid missing critical items.
Tip: Save often. There’s no combat or health meter only the risk of missing one tiny key and halting your progress. Make a habit of photographing every unusual marking or document; some puzzles reference seemingly trivial details captured only in photos.
Must Read About Rusty Lake Roots Walkthrough
3. Exploring the Town: Your First Steps
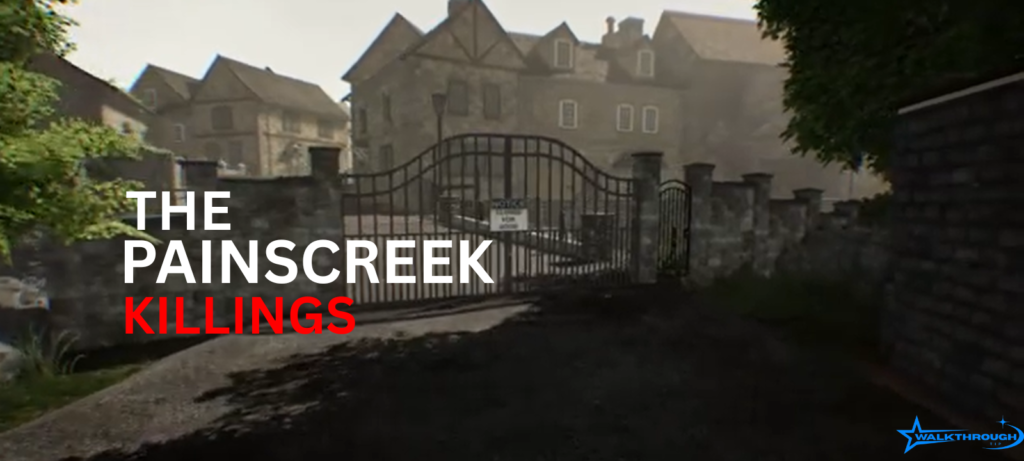
Upon entering Painscreek through the main gate, you’ll see five clustered areas on your map:
- Village Center (gas station, general store)
- Roberts Mansion
- Hospital
- Church & Cemetery
- Residential Block
Navigation Tips:
- Open your map (M by default) frequently; it auto‑updates as you discover new buildings.
- Early on, return to the Village Center often items found on the outskirts sometimes unlock central puzzles.
- Use your camera’s zoom to spot windowed clues in locked buildings before you have the key.
4. Investigating Vivian Roberts’ Estate
The Roberts Mansion is Chapter 1’s focal point. Your goal: access Vivian’s private study.
- Front Door Key: Found inside the gas station’s back office (under the desk).
- Safe Combination (Vivian’s Journal):
- Codes: 5‑1‑2 (based on ages list in her mother’s letter)
- Open the safe in her bedroom closet.
- Codes: 5‑1‑2 (based on ages list in her mother’s letter)
- Secret Passage: Behind the painting in the library; press the lower right corner.
Key Clues:
- Vivian’s final diary entry references “the man in robes,” hinting at church connections.
- A blood‑spattered letter implicates Henry Johnson in a cover‑up.
5. Uncovering Secrets at the Hospital
Chapter 2’s hospital reveals medical records tying Dr. Johnson to Vivian’s death.
- Entry Method: Use the front desk key (found in the mansion’s basement locker).
- Pharmacy Code table:
| Cabinet Label | Code | Source Clue |
| Red Cross | 3‑8‑6 | Prescription note on desk |
| Blue Heart | 1‑4‑9 | Nurse’s diary in break room |
| Green Leaf | 7‑2‑5 | File on Dr. Johnson office |
- Evidence Photos:
- X‑rays showing Vivian’s altered medication.
- A torn medical prescription implicating Scott Brooks.
- X‑rays showing Vivian’s altered medication.
Insight: The hospital’s diary entries reveal that Vivian saw her medication tampered with, confirming foul play beyond a simple murder.
6. Searching the Church and Cemetery
Chapter 3 brings you to St. Matthew’s to decode religious symbolism that connects suspects.
- Reverend’s Study Key: Hidden under the baptismal font (lift the brass plate).
- Graveyard Cipher:
- Headstones numbered 2, 5, 7 form a combination for the locked mausoleum door.
- Inside, you find Charles Roberts’ secret will, shifting suspicion to family greed.
- Headstones numbered 2, 5, 7 form a combination for the locked mausoleum door.
Religious Symbolism: The inverted cross etched on the mausoleum wall matches Vivian’s journal sketch, indicating the killer’s personal vendetta tied to faith.
7. Exploring Abandoned Houses & Residences
Several side‑quests hide vital keys and backstory in residential homes:
- Scott Brooks’ House
- Drawer Code: “BROOKS” on the code lock.
- Reveals love letters between Scott and Vivian, complicating his motive.
- Drawer Code: “BROOKS” on the code lock.
- Henry Johnson’s Home
- Safe Location: Under the floorboard in his study (pry it up with Vivian’s letter opener).
- Contains forged deeds showing his financial desperation.
- Safe Location: Under the floorboard in his study (pry it up with Vivian’s letter opener).
- Trisha’s Room
- Diary: Mentions taboo rituals and her ties to the church, explaining the “robes” reference.
- Diary: Mentions taboo rituals and her ties to the church, explaining the “robes” reference.
These explorations deepen character motivations and supply keys for later puzzles.
8. Solving Puzzles and Hidden Lock Combinations
Puzzles abound, but their logic mirrors real‑world reasoning:
- Clock Puzzle (Village Center Clock Tower):
- Set hands to 10:15 based on Vivian’s “last time seen” note.
- Opens the clock door to reveal a key for the hospital reception.
- Set hands to 10:15 based on Vivian’s “last time seen” note.
- Book Arrangement (Library):
- Title initials spell “P A I N S” when arranged chronologically by publication date.
- Title initials spell “P A I N S” when arranged chronologically by publication date.
- Symbol Matching (Church Floor):
- Align floor tiles matching the heraldic shield in the Reverend’s diary sketch.
- Align floor tiles matching the heraldic shield in the Reverend’s diary sketch.
Each puzzle rewards close reading of documents. Diligent note‑taking photographing every page and labeling your notes prevents frustration.
9. Tracking Clues and Connecting Evidence
Efficient clue management is crucial in this Painscreek Killings guide:
- Clue System: Photos auto‑save, but manually tag each with suspect names.
- Evidence Board: On your map screen, pin major clues to form an accusation web.
- Event Timeline: Create a simple chronological list (see Table in Section 17) to spot inconsistencies.
Pro Tip: Cross‑reference diary dates with newspaper articles in the Village Center. Some entries contain deliberate red herrings; matching dates reveals the truth.
10. Character Analysis and Suspect Profiles
Understanding each person’s motive and opportunity is the backbone of your final accusation:
- Vivian Roberts:
- Victim; her journal reveals she discovered a conspiracy involving the church and hospital.
- Victim; her journal reveals she discovered a conspiracy involving the church and hospital.
- Charles Roberts:
- Husband; stands to inherit her estate, but his infidelity suggests personal betrayal, not murder.
- Husband; stands to inherit her estate, but his infidelity suggests personal betrayal, not murder.
- Scott Brooks:
- Lover; genuine grief but no clear financial motive.
- Lover; genuine grief but no clear financial motive.
- Henry Johnson & Dr. Johnson:
- Father‑daughter duo; their medical tampering and debt paint them as prime suspects.
- Father‑daughter duo; their medical tampering and debt paint them as prime suspects.
- Father Matthew:
- Held secret sermons about sin and punishment; a religious fanatic with access to the church crypt.
- Held secret sermons about sin and punishment; a religious fanatic with access to the church crypt.
Use these profiles to decide who had means, motive, and opportunity.
11. Important Locations and Hidden Areas
Beyond major buildings, don’t overlook:
- Sewer Access Tunnel (beneath the gas station): leads to hospital back door.
- Abandoned Mine Shaft (north edge of map): holds the key to the Roberts basement.
- Bell Tower Loft (inside the church): overlooks the cemetery and contains crucial aerial photos.
Navigation Map:
[Consider embedding a custom map image here marking hidden entrances and tunnels]
Stashing extra keys and photographing hidden rooms ensures you never return empty-handed.
12. Using Your Camera and Notes to Document Clues
Photographing everything isn’t just for completionists it’s essential:
- Must‑Photo Items:
- All safe and lock combinations.
- Handwritten notes (handwriting clues can change).
- Blood stains or fabric scraps.
- All safe and lock combinations.
- Manual Notes: Add context to photos. For example:
“Photo #12 – Henry’s ledger: shows payment from Charles on 3/12/1975.”
Your camera log becomes the backbone of your accusation dossier.
13. The Final Accusation and Ending Choices
Once you’ve gathered all evidence, approach your map screen’s “Accuse” option. You must select:
- Primary Suspect
- Motive
- Key Evidence (at least three items)
Outcomes:
- Correct Accusation: You unlock the gate and see the true culprit’s confession tape.
- Incorrect Accusation: Game over return to last save and review your clue web.
Alternate ending paths hinge on whether you expose church corruption alongside the murder.
14. How to Escape the Town Once the Truth is Uncovered
Post‑accusation, collect your final reward:
- Gate Key: Hidden under the town sign (lift the wooden board).
- Exit Path: Navigate past three puzzle‑locked gates in an underground tunnel.
Completing this sequence triggers the credits and an epilogue slideshow of character fates.
15. Missable Clues and Common Mistakes
Even veteran investigators trip here:
- Missable Item: The pocket watch in Vivian’s safe needed for the clock puzzle.
- Overlooked Room: The attic in Scott’s house, accessible only after photographing the roof cracks.
- Ignored Photo: The torn sermon page leaning against the church pew.
Warning: If you miss the pocket watch, you cannot solve the clock puzzle and will be stuck before the final chapters.
16. Full Checklist: What You Must Find to Complete the Case
| Location | Key Item | Purpose |
| Gas Station | Front Door Key, Sewer Grate Wrench | Town entry, tunnel access |
| Roberts Mansion | Vivian’s Journal, Basement Key | Puzzle codes, hospital key |
| Hospital | Pharmacy Code Photos, Prescription Evidence | Doctor’s motive, medical tampering |
| Church & Cemetery | Mausoleum Will, Inverted Cross Sketch | Family greed, religious motive |
| Scott Brooks’ House | Love Letters, Attic Key | Romantic motive |
| Henry Johnson’s Home | Forged Deeds, Study Safe Key | Financial desperation |
| Village Center Clock Tower | Pocket Watch | Clock puzzle solution |
Use this table as your quick reference for any replay or alternative ending pursuit.
17. Timeline of Events in Painscreek
| Date | Event |
| January 12, 1975 | Vivian moves into the mansion after wedding. |
| February 5, 1975 | Vivian notices medication errors at the hospital. |
| March 3, 1975 | Trisha attends secret church ceremony. |
| March 10, 1975 | Vivian confronts Henry Johnson. |
| March 12, 1975 | Vivian is found murdered. |
Having dates aligned helps you spot alibis and red herrings in your Painscreek Killings walkthrough.
18. FAQs About The Painscreek Killings
How long does it take?
About 6–8 hours for a full Painscreek Killings full walkthrough.
Can you make wrong accusations?
Yes choose carefully or reload your save.
Is there combat?
No; it’s pure investigation.
Replayable?
You can replay any chapter, but missing clues won’t carry over.
19. Tips and Strategies for First-Time Players
- Photograph Everything: Even items you think are unimportant.
- Save in Different Slots: Before major puzzles or accusations.
- Cross‑Reference Clues: Use your notebook to link suspects and evidence.
- Use the Map: Mark buildings you can’t yet access; revisit later.
These strategies prevent frustration and ensure a smooth investigative flow.
20. Final Thoughts and Review Summary
The Painscreek Killings stands out as one of the best detective games of recent years, thanks to its immersive world, challenging puzzles, and emotionally charged narrative. By following this Painscreek Killings walkthrough, you’ll avoid the pitfalls of missing critical keys and mislabeled clues. Whether you’re a mystery veteran or new to investigative adventures, this guide empowers you to solve every puzzle, expose the true culprit, and experience all the game’s nuanced endings. Happy sleuthing!